
There are a lot of things to consider when creating an eLearning course. But, what most people want to determine are the numbers. Specifically, how long will it take to create a course and how much will it cost? Although this will vary, whether you are doing your own eLearning course or handing off to someone else, here are some tips that will save you or your team some valuable time.

Tip #1: Don’t Just Pick An Authoring Tool, Pick the Right One For You
The good news is that most, if not all, of the platforms that you will find when building an eLearning course, will be user-friendly. Most require little to no technical expertise, offer templates and basic interactions that you can incorporate into your eLearning experience. The key to selecting the right authoring tool will be researching each of the available options and narrowing down where those small variants will make a difference for you.
The market has a good selection of easy to use authoring tools, so getting involved is going to be important in differentiating which is the one that will fit your needs. If you are able to view course samples and try different tools, do so. Understanding how your product will be experienced will give you focused on the learner’s journey.
Some helpful resources:
10 Criteria For Choosing The Best Rapid eLearning Authoring Tools
5 Tips On How To Choose An Authoring Tool
And if you want to try out one now, request a FREE TRIAL of SHIFT's eLearning authoring tool here.
Tip #2: Don’t Skip the Blueprint
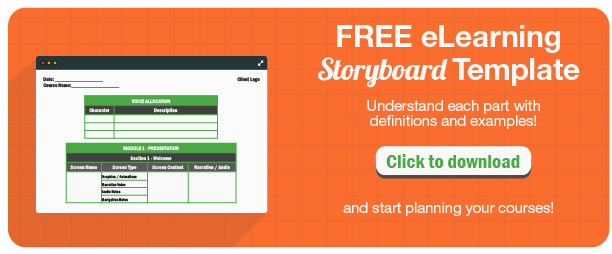
If you’re considering jumping straight into content, DON'T! Creating a storyboard will be essential to creating a coherent sequence of the content in your course.
A storyboard ’s a visual guide of the course’s blueprint. It’s used to properly arrange elements and see the “big picture.” In other words, this is an outline of everything that will go into your course and when it will appear. This will include: text, visuals, audio, navigation, knowledge checks, assessments, links, and other features that can add value to the learning experience.
How well do you think an architect would do without the blueprints? Do you think he would remember every detail? Specifics will be overlooked; this will undoubtedly create holes in the content, compromising the quality of the experience and introducing doubt to the learner.
You can have great content, but if it doesn’t flow, the learner won’t absorb it. How will this save you time? Not doing it, will require that you go back and start over. Doing this early will give team members a chance to make adjustments and suggestions when adjustments and suggestions are welcome. Once the pieces are set, making changes because complicated.
Tip #3: Smarten up Processes with Collaborative Technology
There is no industry or development process, whether it’s creative or planning, that does not benefit from collaboration. In eLearning, it becomes very hard not to have lots of stakeholders wanting to add or delete or improve content. The key is to make these changes in real time. Going from discussion to change to finished product in real time. The discussion-edit-review process will likely loop a few times, so even more critical is to have the technology and methods to collaborate in real time to accomplish these loops as quickly as possible.
Authoring tools like SHIFT offer collaborative environments that allow you to connect with team members working on courses at the same time. This is going to save you a lot of time, and frustration!
Think about what Google Docs has done for your business or personal organization. It makes a huge difference to see comments in real time and make adjustments accordingly as you go.
Tip #4: Size Does Matter
Have you ever tried to jam things into a suitcase? What ends up happening? You usually ruin the suitcase (cost), you wrinkle and bend items (quality), and then, you’ll have to iron out each piece when you arrive (time). The same thing will happen with content if you decide to jam everything into an eLearning course. You’re going to push a dent in your design and development, it’s going to cost more, and you risk boring your learner.
Keeping it purposeful and light is better. Providing additional resources can encourage learners to learn more if, in fact, they want to.
The more you put out there, the less “essential” it feels.
Did you know? Microlearning courses can be produced in 300% percent less time and 50% less cost than traditional courses.
According to learning architect Ray Jimenez, bite-sized learning courses can be produced faster and at less cost than traditional courses. Here’s why:
- There’s no need to pay for the instructor’s time, buy or rent physical classrooms and pay for the utilities, and spend money on classroom equipment.
- It is easier and less time- and resource-intensive to update digital information than reprint training manuals and conduct supplementary classroom training sessions.
- It is easier and less time-consuming to roll out microlearning courses because they are modular in nature.
Here are some more benefits of adopting microlearning.
Tip#5: If it works, reuse it
Thank the heavens for templates! In the world of content creation, lives have been saved by the option to reuse a template. Templates are carefully constructed to work successfully. It’s true that they can feel similar, but in any case, most of them meet a certain standard.
No matter which tool you are using, create your own templates as you dive deep into eLearning courses. Establish your brand identity not just by the quality of your course, but by the flow and presentation of the experience.
Using the structure that worked for you will always guarantee a similar navigation. For example, Welcome, Instructions, Objectives, Module, Checks, Summary, etc. If your templates are liked by learners, they’ll learn to depend on your courses unfolding and working in a certain way. This will save you time, money, but it’ll also save you doubt. If it’s worked before, it’ll work again.
Read: 10 Compelling Reasons You Should Use Templates for eLearning
In short, though developing an eLearning course does require time and effort, it’s not an endless road. Like all things in life, practice makes perfect. The more you invest in collaborating with your team, adjusting details, and learning to use the program features to your benefit, the process gets smoother, and you may even begin to enjoy what once seemed intimidating and tedious.
Happy developing, folks!
Ready to transform your corporate training?
See real results from companies that train with SHIFT — or talk to our team.